Why Is My Ice Maker Not Making Ice? Troubleshooting Guide
Is your ice maker on strike? You’re not alone. Many homeowners face the frustrating issue of an ice maker that’s suddenly stopped producing those refreshing cubes. Whether you’re hosting a party or just want a cold drink on a hot day, a malfunctioning ice maker can be a real inconvenience. But don’t worry – we’ve got you covered with this comprehensive guide to diagnosing and fixing your ice maker problems.
In most cases, an ice maker stops working due to issues with the water supply, freezer temperature, clogged components, or mechanical failures. By following our step-by-step troubleshooting process, you can often resolve the problem without calling a professional. Let’s dive in and get your ice maker back in action!
Common Reasons for Ice Maker Failures
Before we start troubleshooting, it’s helpful to understand the most frequent culprits behind ice maker issues. Knowing these can help you pinpoint the problem more quickly.
Water Supply Issues
One of the most common reasons your ice maker isn’t making ice is a problem with the water supply. After all, no water means no ice! Water supply issues can range from a simple shut-off valve that’s been accidentally closed to more complex problems like a frozen or kinked water line.
Key water supply problems include:
- Closed water shut-off valve
- Low water pressure
- Clogged water filter
- Frozen water line
- Faulty water inlet valve
Freezer Temperature Problems
Your ice maker needs the right temperature to function properly. If your freezer is too warm, the ice won’t form. Conversely, if it’s too cold, the water might freeze before it reaches the ice maker tray.
Temperature-related issues could be due to:
- Incorrect thermostat settings
- Faulty thermostat
- Problems with the freezer’s cooling system
- Overpacked freezer blocking air circulation
Clogged or Dirty Components
Over time, mineral deposits from your water supply and food particles can build up in your ice maker, affecting its performance. Regular cleaning is essential to keep your ice maker running smoothly.
Components that commonly get clogged or dirty include:
- Water filter
- Water inlet valve
- Ice maker mold
- Ice chute
Mechanical Malfunctions
Sometimes, the problem lies within the ice maker’s mechanical parts. These issues can range from a jammed ice maker arm to a faulty motor.
Common mechanical problems include:
- Stuck or broken ice maker arm
- Faulty ice maker motor
- Damaged ice mold
- Malfunctioning ejector blades
Now that we’ve covered the main culprits, let’s move on to diagnosing your specific ice maker problem.
Diagnosing Your Ice Maker Problem
Before you start taking things apart, it’s important to properly diagnose the issue. This can save you time and prevent unnecessary repairs.
Check the Power and Settings
First things first – make sure your ice maker is actually turned on! It might sound obvious, but sometimes the simplest explanation is the correct one.
- Check if your refrigerator is plugged in and receiving power.
- Locate the ice maker’s on/off switch (usually on the ice maker itself or on your fridge’s control panel) and ensure it’s in the “on” position.
- If your ice maker has a feeler arm or bail wire, make sure it’s in the down position.
- Check your freezer’s temperature setting. It should be between 0°F and 5°F (-18°C to -15°C) for optimal ice production.
Inspect the Water Supply
Next, let’s make sure your ice maker is getting the water it needs.
- Locate the water shut-off valve (usually behind the refrigerator or under the sink) and ensure it’s fully open.
- Check the water line for any visible kinks or damage.
- If your refrigerator has a water dispenser, try dispensing water to see if it’s flowing properly.
Examine the Ice Maker Assembly
Take a close look at the ice maker itself for any visible issues.
- Remove the ice bin and check for any ice clumps or foreign objects that might be blocking the mechanism.
- Inspect the fill tube (the part that brings water into the ice maker) for any ice buildup.
- Look at the ejector arms and ice mold for any signs of damage or excessive frost buildup.
Assess the Freezer Environment
The conditions in your freezer can affect your ice maker’s performance.
- Check if your freezer is overpacked, which can restrict air circulation and affect temperature.
- Look for any food items placed too close to the ice maker that might be interfering with its operation.
- Check for any unusual frost buildup in the freezer, which could indicate a problem with the defrost system.
By thoroughly assessing these areas, you should have a good idea of what might be causing your ice maker to malfunction. Now, let’s move on to step-by-step troubleshooting to fix the problem.
Step-by-Step Troubleshooting
Now that you’ve diagnosed the potential issues, it’s time to roll up your sleeves and get to work. Remember, always unplug your refrigerator before performing any repairs or maintenance for safety.
Verifying Power and Control Settings
Let’s start with the basics:
- Ensure the refrigerator is plugged in securely.
- Check your home’s circuit breaker to make sure it hasn’t tripped.
- Locate the ice maker’s on/off switch and toggle it off and on again.
- If your ice maker has a feeler arm, make sure it’s pushed down.
- Check your freezer’s temperature setting and adjust it to 0°F if necessary.
Testing the Water Supply Line
Next, let’s make sure water is flowing to your ice maker:
- Locate the water shut-off valve and ensure it’s fully open.
- Inspect the entire length of the water line for kinks or damage.
- If possible, disconnect the water line from your refrigerator and place it in a bucket.
- Turn on the water supply and check for a steady stream. If the flow is weak or non-existent, you may have a clog or low water pressure.
Cleaning the Water Filter
A clogged water filter can significantly reduce water flow to your ice maker:
- Locate your refrigerator’s water filter (consult your manual if unsure).
- Remove the old filter and inspect it for debris or discoloration.
- If it’s been more than six months since your last filter change, replace it with a new one.
- If you don’t have a replacement, you can temporarily bypass the filter to test if it’s the cause of the problem (refer to your manual for instructions).
Clearing Ice Maker Blockages
Ice buildup can prevent your ice maker from functioning properly:
- Remove the ice bin and dump out any ice.
- Inspect the ice chute for any ice clumps or foreign objects.
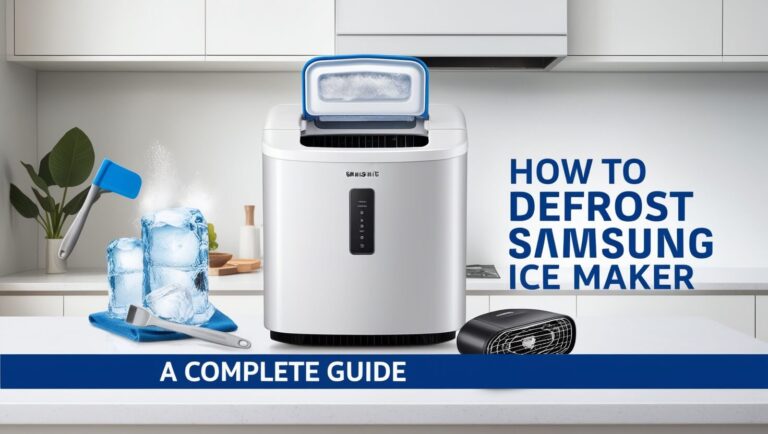
- Use warm water to melt any ice buildup in the fill tube or ice maker mechanism.
- Dry thoroughly with a clean cloth to prevent new ice formation.
Adjusting Freezer Temperature
If your freezer temperature is off, it can affect ice production:
- Use a freezer thermometer to check the actual temperature.
- Adjust the freezer thermostat to achieve a temperature between 0°F and 5°F.
- Wait 24 hours for the temperature to stabilize before checking ice production.
If these steps don’t resolve the issue, you may need to move on to more advanced repair techniques.
Advanced Ice Maker Repair Techniques
If basic troubleshooting doesn’t solve the problem, you might need to delve deeper into your ice maker’s components. While these repairs are more complex, they can often be done at home with some patience and the right tools.
Replacing the Water Inlet Valve
The water inlet valve controls the flow of water into your ice maker. If it’s faulty, your ice maker won’t receive water.
- Unplug your refrigerator and turn off the water supply.
- Locate the water inlet valve (usually behind the refrigerator or in the bottom grille).
- Disconnect the wiring harness and water lines from the valve.
- Remove the mounting screws and take out the old valve.
- Install the new valve, reconnect the wiring and water lines, and secure it with the mounting screws.
- Turn the water back on and check for leaks before plugging in the refrigerator.
Fixing a Faulty Ice Maker Module
If the ice maker module itself is malfunctioning, you may need to replace it:
- Unplug the refrigerator and remove the ice bin.
- Locate the mounting screws holding the ice maker in place and remove them.
- Disconnect the wiring harness from the ice maker.
- Remove the old ice maker and install the new one.
- Reconnect the wiring harness and secure the new ice maker with the mounting screws.
- Replace the ice bin and plug the refrigerator back in.
Addressing Thermostat Issues
A faulty thermostat can cause temperature inconsistencies that affect ice production:
- Locate the thermostat control (usually inside the refrigerator or freezer compartment).
- Use a multimeter to test the thermostat for continuity.
- If the thermostat fails the continuity test, it needs to be replaced.
- Remove the old thermostat and install the new one, making sure to connect the wiring properly.
Repairing or Replacing the Water Line
If your water line is damaged or frozen, you’ll need to address this:
- For a frozen line, use a hair dryer to carefully thaw it out.
- If the line is damaged, you’ll need to replace it:
- Turn off the water supply and unplug the refrigerator.
- Disconnect the old water line from both the refrigerator and the shut-off valve.
- Install the new water line, making sure it’s not kinked or pinched.
- Reconnect to the refrigerator and shut-off valve, then turn the water back on and check for leaks.
Remember, if you’re not comfortable performing these repairs yourself, it’s always best to consult a professional appliance technician.
Preventive Maintenance for Ice Makers
An ounce of prevention is worth a pound of cure, especially when it comes to ice makers. Regular maintenance can help prevent many common ice maker problems and extend the life of your appliance.
Regular Cleaning Schedule
Keeping your ice maker clean is crucial for its performance and the quality of your ice:
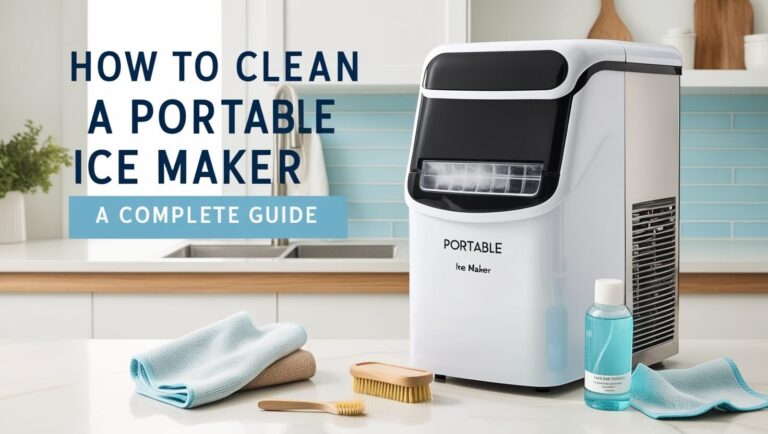
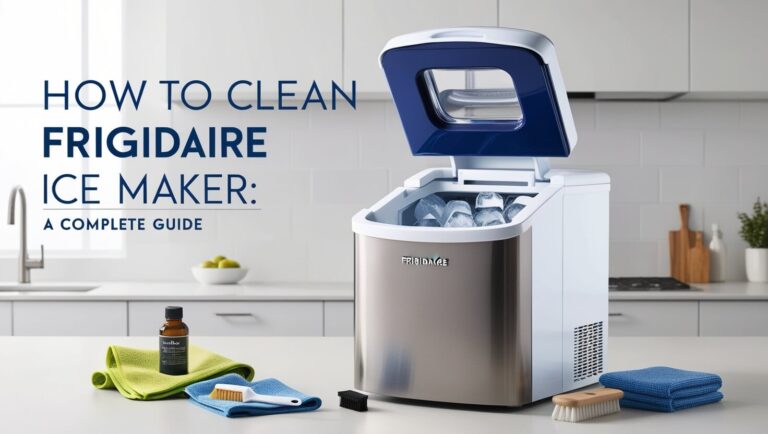
- Clean the ice bin at least once a month with mild soap and warm water.
- Wipe down the ice maker’s exterior and the area around it to prevent dust buildup.
- Every 3-6 months, run a cleaning cycle using a manufacturer-approved ice maker cleaner.
- Regularly check and clean the water dispenser nozzle if your refrigerator has one.
Water Filter Replacement
A clean water filter is essential for both ice quality and ice maker performance:
- Replace your refrigerator’s water filter every 6 months, or more frequently if you have hard water.
- Mark your calendar or set a reminder on your phone to stay on top of filter changes.
- Always use filters recommended by your refrigerator’s manufacturer for the best results.
Proper Freezer Maintenance
Your ice maker’s performance is closely tied to your freezer’s overall health:
- Keep your freezer organized and avoid overpacking it, which can restrict air circulation.
- Regularly check and clean the freezer’s door gaskets to ensure a proper seal.
- Defrost your freezer if you notice excessive frost buildup (for non-frost-free models).
- Vacuum the condenser coils (usually located behind or underneath the refrigerator) every 6-12 months to maintain efficient cooling.
Monitoring Water Quality
The quality of your water can significantly impact your ice maker’s performance:
- If you have hard water, consider installing a water softener to prevent mineral buildup in your ice maker.
- Regularly test your water quality, especially if you use well water.
- If you notice any changes in water taste or smell, have your water tested and address any issues promptly.
By following these preventive maintenance steps, you can significantly reduce the likelihood of ice maker problems and ensure a steady supply of ice for years to come.
When to Call a Professional
While many ice maker issues can be resolved with DIY troubleshooting, there are times when it’s best to call in a professional appliance technician. Here’s when you should consider professional help:
Signs of Complex Issues
Some problems are beyond the scope of most DIY repairs:
- If you hear unusual noises coming from your ice maker or refrigerator.
- If there’s visible damage to internal components of the ice maker.
- If you’ve tried all the troubleshooting steps and the problem persists.
- If you notice any signs of electrical issues, like sparking or burning smells.
Warranty Considerations
Before attempting any major repairs, consider your warranty status:
- Check if your refrigerator is still under warranty. Many warranties last for 1-5 years from the date of purchase.
- Be aware that DIY repairs might void your warranty. Always check the warranty terms before attempting repairs yourself.
- If your appliance is under warranty, contact the manufacturer or authorized service provider for repairs.
Cost-Benefit Analysis of Repairs vs. Replacement
Sometimes, replacing your ice maker or even your entire refrigerator might be more cost-effective than repairing it:
- Consider the age of your appliance. If it’s more than 10 years old, replacement might be a better long-term solution.
- Get a quote for professional repairs and compare it to the cost of a new ice maker or refrigerator.
- Factor in energy efficiency. Newer models are often more energy-efficient, which could save you money in the long run.
Remember, a professional technician can provide an accurate diagnosis and give you a clear picture of your options. Don’t hesitate to seek expert advice if you’re unsure about the best course of action.
Choosing a New Ice Maker
If you’ve decided that replacing your ice maker is the best option, here’s what you need to know to make an informed choice:
Types of Ice Makers Available
There are several types of ice makers to choose from:
- Built-in refrigerator ice makers: These are integrated into your refrigerator’s freezer compartment.
- Standalone under-counter ice makers: These are separate appliances that can be installed under your kitchen counter.
- Portable countertop ice makers: These don’t require a water line connection and can be moved around as needed.
Features to Consider
When shopping for a new ice maker, keep these features in mind:
- Ice production capacity: How much ice do you need daily?
- Ice cube size and shape options: Some ice makers offer multiple cube sizes or even crushed ice.
- Storage capacity: How much ice can the unit store at once?
- Speed of ice production: How quickly does it make new batches of ice?
- Energy efficiency: Look for ENERGY STAR certified models to save on utility bills.
- Noise level: Some ice makers can be quite noisy during operation.
- Smart features: Some newer models offer Wi-Fi connectivity and smartphone controls.
Installation Requirements
Before purchasing, consider the installation needs:
- Space requirements: Measure the available space in your freezer or under your counter.
- Water line access: Built-in and under-counter models typically require a nearby water line.
- Electrical requirements: Ensure you have the proper voltage and a grounded outlet.
- Ventilation needs: Some models require specific clearances for proper air circulation.
By carefully considering these factors, you can choose an ice maker that best fits your needs and kitchen setup.
Ice Maker Alternatives
If you’re not ready to replace your ice maker or are looking for temporary solutions, there are several alternatives to consider:
Portable Ice Makers
Portable ice makers are a great option for those who need ice occasionally or don’t have the space for a built-in unit:
- They don’t require a water line connection – you just fill them with water when needed.
- They’re compact and can be stored away when not in use.
- Many models can produce ice in as little as 6-10 minutes.
- They’re generally more affordable than built-in ice makers.
However, keep in mind that portable ice makers typically can’t store ice for long periods, as the ice will melt and be recycled back into the water reservoir.
Traditional Ice Trays
Sometimes, the old-fashioned method is the most reliable:
- Ice trays are inexpensive and come in various sizes and shapes.
- They don’t require any special installation or maintenance.
- You have control over the water quality used to make the ice.
- Silicone ice trays are flexible, making it easier to remove ice cubes.
The downside is that making ice with trays takes longer, and you’ll need to remember to refill them regularly.
Store-Bought Ice Options
For occasional needs or large gatherings, store-bought ice can be a convenient option:
- It’s readily available and comes in various sizes (bags or blocks). 2. It’s often cheaper than replacing or repairing an ice maker for infrequent use. 3. Some stores offer specialty ice options like crushed ice or gourmet ice cubes.
The main drawbacks are the need for frequent trips to the store and the environmental impact of packaging.
Remember, while these alternatives can be helpful in a pinch, they may not be ideal long-term solutions if you frequently need large amounts of ice.
Frequently Asked Questions About Ice Maker Problems
Let’s address some common questions that people often have about ice maker issues:
How long should an ice maker last?
On average, a well-maintained ice maker should last 4-7 years. However, some may last up to 10 years or more with proper care. Factors affecting lifespan include usage frequency, water quality, and maintenance habits.
Why are my ice cubes small or hollow?
Small or hollow ice cubes often indicate a problem with water flow. This could be due to:
- Low water pressure
- A partially clogged water filter
- A faulty water inlet valve
- Mineral deposits in the ice maker mold
Try cleaning or replacing the water filter first. If that doesn’t help, you may need to check the water inlet valve or have a professional inspect your water pressure.
Can low water pressure affect ice production?
Absolutely! Ice makers typically require a minimum water pressure of 20 psi (pounds per square inch) to function properly. Low water pressure can result in:
- Small or malformed ice cubes
- Slow ice production
- The ice maker not working at all
If you suspect low water pressure, you can test it with a pressure gauge or consult a plumber.
How often should I clean my ice maker?
For optimal performance and hygiene, you should:
- Clean the ice bin monthly with mild soap and warm water
- Wipe down the exterior of the ice maker weekly
- Run a deep cleaning cycle with a manufacturer-approved cleaner every 3-6 months
- Replace the water filter every 6 months or more frequently if you have hard water
Regular cleaning prevents mineral buildup, removes potential contaminants, and ensures your ice maker continues to produce clean, fresh-tasting ice.
Wrapping UP: Keeping Your Ice Maker in Top Shape
Ice makers are a modern convenience that we often take for granted – until they stop working. By understanding the common issues that can affect your ice maker and knowing how to troubleshoot them, you can often resolve problems quickly and easily.
Remember these key points:
- Regular maintenance is crucial. Clean your ice maker regularly, replace the water filter as recommended, and keep an eye on your freezer’s overall health.
- Many issues stem from simple problems like power supply, water flow, or temperature settings. Always start your troubleshooting with these basic checks.
- Don’t ignore small problems. Address issues like slow ice production or odd-shaped cubes promptly to prevent more serious malfunctions down the line.
- Know your limits. While many ice maker problems can be resolved with DIY solutions, don’t hesitate to call a professional for complex issues or if you’re unsure about a repair.
- Consider the age and efficiency of your appliance. Sometimes, replacing an old ice maker or refrigerator can be more cost-effective in the long run.
- Explore alternatives like portable ice makers or ice trays if you’re between repairs or replacements.
By following the tips and techniques outlined in this guide, you can ensure that your ice maker continues to provide you with a steady supply of ice for your refreshing drinks and cooling needs. Remember, a little bit of care and attention can go a long way in keeping your ice maker running smoothly for years to come.
So the next time you reach for a cold drink, you can do so with confidence, knowing that your ice maker is in top shape and ready to serve up the perfect ice cubes. Cheers to trouble-free ice making!

